Reading Time: 7 minutes
What is long term vehicle storage? Long term vehicle storage is when you place your car in safe-keeping for a month or more at a time in a storage facility or a storage garage.
There’s no mistaking the fact that winter is starting to wrap its frosty fingers around our part of the planet. From brown, red, yellow, and orange leaves falling onto the hood of the car to frosty windshields in the morning, it’s clear that winter is imminent. Before we know it, we’ll all be walking around in multiple layers any day now. That means it’s time to start thinking about winterizing your vehicle, especially if you have a drop-top, which is not exactly suitable for our frosty climes… So if you’re tucking away your car for the winter, follow these car storage tips to ensure it comes out of hibernation in tip-top condition come summer.
Where Can I Store My Car?
With luxury automobile manufacturers competing to continue exceeding buyers’ expectations, new cars continue to baffle our brains with the way in which they bring luxury into our lives. But what does a car consider a luxury (if a car were to have a conscious, of course)?
There are only two things that are luxurious in the life of an automobile and that would be:
- Having a garage with walls and a roof
- Having that space clean and neat.
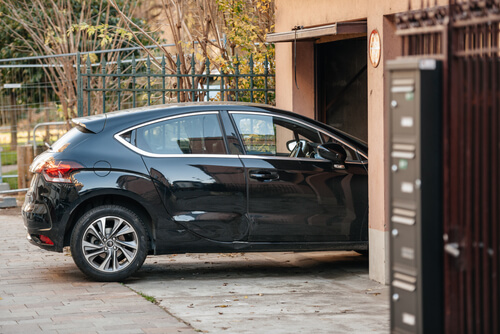
If you have a neat, clean, and clutter-free garage – GREAT! That means you can store your vehicle in there for the winter while you take your RV down south during snowbird season. If not, of course, that doesn’t mean you have to leave your baby out in the cold and snow. Your other options include:
Public parking garages offering extra underground parking spots for rent;
- A friend’s home garage;
- A storage unit;
- A professional car storage lot.

How do I store my car for winter step-by-step?
At Nationwide Auto Transportation, we work closely with many professionals in the auto industry. From auto carriers to car dealers and collectors, these are the guys (and gals) who know how to look after a car. Sometimes, we ship cars on their behalf. However, when they’re unable to receive their car on the other end of the auto shipping route, we have to place it in storage. Here’s a collection of their best long term vehicle storage tips.
Step 1: Clean your car (properly!)
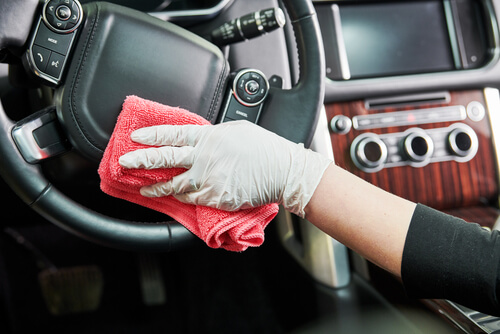
The biggest DIY / car fanatic will tell you that cleaning up their cars before storage is a great feeling. But trying to do it when the temperatures are already frosty is a bad idea. Save yourself the time and hassle. Take your car to a professional detailer and you’ll get a better result without the frosted digits.
Ideally, your car should be cleaned (inside and out) and dried and waxed. Dust and vacuum the car on the inside, including the windows. Use saddle soap to clean any leather in the car and remove anything that might deteriorate over time from the car.
If you live in an area where there’s moisture and salt, it’s especially important to make sure the car is as clean and dry as possible. The wax will offer some protection.

Step 2: Fill up the gas tank
Unless your garage is temperature controlled, it’s likely that it can get pretty cold in the garage, especially during a freeze or when temperatures drop at night. That can cause your fuel tank – especially on an older car – to start attracting moisture. When that happens, the fuel filter can become clogged and rusted.
You can combat that issue by filling up the tank with low-ethanol, high-octane fuel before you store your car for the winter. When the tank is as full as possible, there is less empty air. Therefore, contaminants will be diluted, which will help prevent moisture buildup.
Additionally, consider investing in fuel stabilizer, which will help prevent water from separating from the gasoline.
Step 3: Up the Tire Pressure
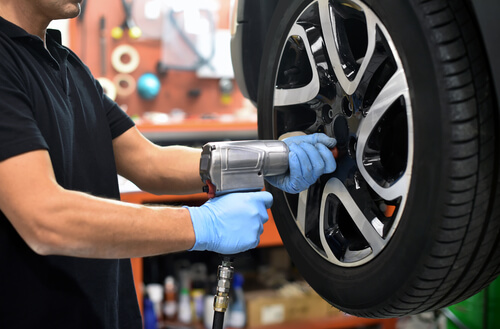
Most of us keep our tires at the correct pressure to ensure proper traction and reduced wear. But when you store your car for longer periods, it is even more important to inflate your tires a little more. Why? Well, when a car sits for a long time, it can develop flat spots in areas where the rubber is continually compressed. Avoid flat spots by:
- adding a few extra pounds of pressure before you put your car in storage. But be careful to ensure that you take the readings while the tires are cold.
- Using jack stands to take the weight off the tires completely – unless you have an older car with a sagging frame, or a new car with air-adaptive suspension.
- Parking the car on 2×10-inch wood boards to provide mild insulation against a concrete floor. This will help prevent the rubber from hardening too much.

Step 4: Top up the fluids
Most mechanics will agree that it’s a good idea to change your oil before putting your car in storage for winter. It’s important to remember that if you periodically start the car without allowing the engine to reach full operating temperature, condensation can form in the exhaust system, and that can cause parts to rust.
Although new synthetic motor oils are likely to last longer while the car is in storage, these oils do contain more detergents that can cause older cars to spring leaks, particularly if the gaskets are hardened. It would be a good idea to place a drip tray or a sheet of cardboard under the oil pan when you put the car in storage, or to park on a sheet of plastic or a tarp. This will also help prevent oils from the floor to creep up into the rubber of your tires.
While it should go without saying, we sometimes don’t think about antifreeze. Apply your antifreeze before you put the car in storage and drive a few miles to allow the mixture to circulate through the water jackets on the engine.
Place packets of silica gel or baking soda inside the car to help absorb any moisture. It’s equally important to keep the inside of the car dry as it is the outside.
Step 5: Keep up the Energy by keeping the battery charged
The last thing you want at the start of spring, is to be ready for your first road trip, just to find that your battery has failed. If you’re storing the car in your home garage, you can simply use a plug-in battery tender to keep your amps and volts where they need to be to give the starter sufficient juice. Some cars – such as Porsches – constantly drain the battery.
If you have an older car, simply pop the battery out and use dielectric grease on the terminals to prevent them from corroding. Store your battery in a warmer area.

Step 6: Uninvite Unwanted Guests (such as rodents)
Rodents just love that old-car, leather upholstery smell – and taste! Getting rid of them can be tricky. Mice and rats love chewing on upholstery, cables and air filters. This can lead to damage that can be expensive to repair and it takes away from the authenticity of the car.
Remove the air filter from your car, and block off the intake manifold. Be sure to make a note somewhere to replace this come spring.
Step 7: Disengage the Parking Brake
By engaging the parking brake for too long, it can fuse with the interior of the wheel. Therefore, be sure to use a wheel chock or a piece of wood to stop the tires.
Step 8: Cover Up Your Vehicle!
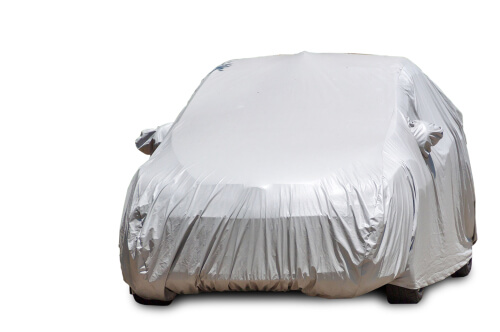
Now that you’ve done all you could to protect your car, there’s one more task to perform, and that’s to cover it up. The right cover helps prevent moisture while offering the best possible breathability to prevent moisture damage to the metal and paint. Your options include:
An old sheet – This was the go-to option in the olden days. Although it is still an option, you may want to look into proper automotive covers.
A dust cover – Similar to an old sheet, a dust cover can help prevent bird droppings and dust from settling on the car.
A tarp – Another familiar favorite, it is important to note that tarps can trap moisture. It does not breathe as well as a sheet, dust cover, or proper automotive cover.
Automotive covers come in all shapes and sizes, from custom-fitted to your specific car’s model, to one-size-fits-all. They are made from fibers that are soft and breathable and they wrap snugly around the car. Whichever you opt for, secure it properly, especially if you’re storing your car in a public garage. If you’re renting a parking bay in a public parking garage, it would be a good idea to prop cardboard boxes up against the sides of your vehicle to prevent door dings.

Step 9: Post Car Storage Inspection
Well done on taking all the precautions for storing your car over the winter. Are you ready to take it out of storage and onto the open road?
Easy there, tiger! You can’t just get in and drive off into the sunset. That would be asking for trouble…
First, perform a visual inspection of your car inside and out. There may be pests that have moved into the exhaust. You may also have to top off engine fluids that may have evaporated or drained and you should probably inspect rubber parts to see if they have degraded. It’s quite possible that you have to inflate the tires.
Once you’ve performed your inspection, don’t just start the car and drive away. Instead, let the car run for a few minutes first so that you can ascertain:
- That the brakes are working as they should;
- Whether there are any strange sounds;
- Or anything else that is abnormal.
If you notice anything that’s not as it should be, stop by your trusty mechanic to give your fresh-out-of-storage vehicle a quick once-over.
Taking the time for proper winterization before you store your car for winter will save you time, money, and heartache.


