
Reading Time: 10 minutes
Ready to winterize your RV? Ensure your mobile haven stays cozy and protected with our expert maintenance tips.

You might be wondering why we’re recommending RV winterization at this time of the year. Well, there’s actually a good reason for it. You would use many of the same methods to prepare your RV for shipping as you would to prepare it for winter.
Why Go to the Trouble?
While winterizing your RV ahead of the colder months helps prevent weather damage, preparing your RV for shipping protects it while it is in transit. So whether you’re sending your RV to storage for winter or simply shipping it back home after your winter down south, we’ll show you how to do a better job than the dealers.
RVing is the epitome of the good life for many families in the US and Canada. It offers so many benefits. You can travel at your leisure, in the comfort of your very own (home away from) home. The whole family can travel in style, exploring amazing stopovers on your way to your ultimate destination. Then again, perhaps you decide to take the road to nowhere in particular, exploring new roads and taking in different experiences.
When you have an RV, you don’t waste time driving to and from your accommodation venue to explore places. You can prepare your own meals in your camper, thus saving a lot of money on costly hotels and restaurant meals. You’re not tied to bookings. Instead, your “home” goes with you wherever you go and you can stop whenever you find a spot where you want to spend a little more time.
Planning an International RV Adventure? 🌍🚐
Before you hit those global roads, it’s crucial to know the ins and outs of international RV shipping. From regulations to best practices, our latest guide covers it all. Read more to make your overseas journey seamless: International RV Shipping Guidelines.

Looking to ship your RV across the country? Check out our comprehensive guide on Cross-Country RV Shipping to find out everything you need to know.
Ditch the Crowds
However, if you choose to head to a specific destination for the duration of your summer break, that doesn’t mean you have to take the RV into town and try to squeeze into small parking spaces and narrow roads. You can always ship your normal car to the destination, and use that for quick supply trips, or to go out to dinner.
One new benefit of RVing that has come to light in 2020, is the fact that RV camping makes it easy to enjoy a vacation in the wake of the coronavirus. It’s the perfect way to keep some social distancing.
Either way, you want to protect your fifth wheel, travel trailer or motorhome in transit. After all, it was a sizable investment, which one expects to last for many years – and it can, with adequate protection. In this post, we’ll talk about how to winterize your RV ahead of winter and ahead of shipping.
Where can I find my original RV owner’s manual?
It’s important to follow your owner’s manual instructions. The tips below are general tips, but some models might have specific RV winterizing instructions. If you don’t have the original owner’s manual, you can request it from the manufacturer’s website. Here are a few links to some of the biggest brands and their RV owner’s manuals:
- Winnebago RV Owner’s Manuals
- Gulf Stream Coach RV Owner’s Manuals
- Jayco RV Owner’s Manuals
- Heartland RV Owners Manuals
- Fleetwood RV Owner’s Manuals
- Coachmen RV Owner’s Manuals
- Forest River RV Owner’s Manuals
- Tiffin Motorhomes Owners Manuals
If you belong to an RV camping club, that would be a great place to inquire. It’s a great idea to join these clubs, if you have not done so yet.
A simple search of the manufacturer’s website should yield the manual you’re looking for, but if it doesn’t, do a web search by entering the manufacturer’s name, the model of your RV and append it by adding “owner’s manual”. Alternatively, you could request assistance from online RV owner’s clubs or forums (such as RVUSA) both of which provide a treasure trove of insights into all things RV related. As a last resort, you could post a request on Craigslist, eBay or Facebook Marketplace.
Considering professional vehicle shipping for your RV? Discover the benefits and expertise offered by Nationwide Auto Transportation.
Winterize & Store Your RV: Step-by-Step
An RV has many parts that need special care, as you will discover while reading this post. If you’ll be storing your RV for winter, there are certain additional steps that are not necessary when you’re shipping your RV. During winter storage, your RV will probably remain closed up for several months. It’s important to consider your storage options carefully.
First consider: where can I store my RV?
You could store it in a storage facility, or at your home. Your budget might have a big influence on where you store it, but it’s important to think of the various pros and cons of each.
- At a dealership – Storing your RV at a dealership is convenient, as they will probably do monthly checks and run the engine to keep the battery charged and their storage facility should be suitable for storage.
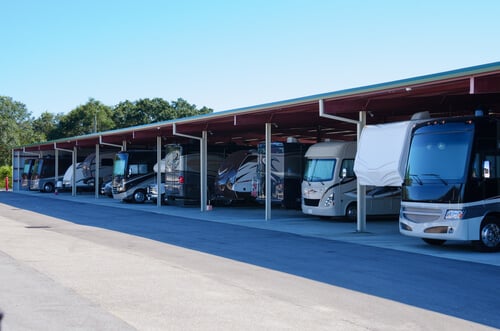
- In a storage facility – Storing your RV in a storage facility is also convenient, especially if you don’t have a covered storage spot on your property, but you must do monthly checks and run the engine. Ensure that the storage facility has an undercover concrete or blacktop parking area, or a well-drained dry gravel parking pad.
- At home – Storing your RV at your home is a good option if you have suitable, covered storage space available.
Think Before You Store | snowbird auto shipping
Wherever you store your RV, be sure that it is covered and that the tires are not in the snow, as the rubber will become brittle and crack. If you have to store it at home, do so in a place that is out of the way, so that you don’t have to move the RV every time you need to pull another car in or out. Avoid parking it on the lawn, which will be soaked if it rains or snows, and damage the tires. If you have to park it on the lawn, place bricks or wooden pallets under the wheels, and apply wheel covers.
Note that there might be zoning restrictions when it comes to parking your RV at home. Storing your RV in a specialized undercover facility is usually the best option. Why? Because RVs are designed to be as lightweight as possible, and heavy snow can add a lot of weight to the roof. This can lead to the roof splitting at the seams, and the roof could completely collapse, thus distorting the side walls. Not to mention the damage snow can do when it melts and leaks into the tiniest of cracks inside of your trailer…
How to Winterize Your RV in 8 Steps
Step 1: Winterize your RV water pump system
Some dealerships offer RV winterization when you store your RV with them. However, their most important priority is to prevent ice from damaging your water system, and potentially resulting in damage to the vehicle. When water freezes, it expands, and can cause havoc, including:
- Pump failure
- Tank ruptures
- Splits in pipes
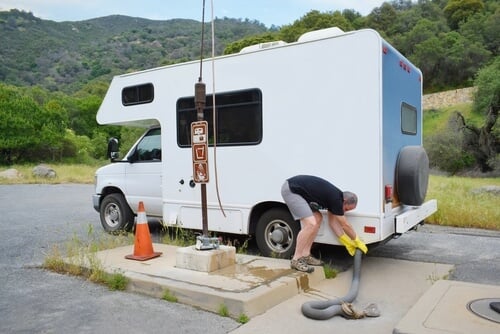
If you want to winterize your RV water system, start by draining it. It’s a good idea to use compressed air to evacuate any remaining water from the system. When it comes to RV winterization before placing your RV in storage, it is important to run antifreeze through the water system.
Draining all liquids from your vehicle is important if you’re shipping your RV as well. For one, the fuel and other holding tanks can add weight to your RV shipping weight, thus making the shipment more expensive. Also, it can lead to mishaps. As such, you should keep just enough fuel to start the RV, drive it onto the truck and drive it back down. Just under a quarter of a tank will do just fine.
Thorough RV winterizing will help avoid preventable repairs. If your grey water -, black water -, fresh water, and hot water heater holding tanks are drained, you should not need to apply RV antifreeze. However, the water lines in the RV are of a small diameter and there’s not a lot of room for the water to expand when it freezes. You should apply antifreeze during the colder months. However, you should only use an approved RV antifreeze product, and prevent it from entering the hot water heater. If your RV has a hot water heater bypass valve, that makes the job much easier. Additionally, you should add antifreeze to drains and seals.
Step 2: Generators
Having a generator in your RV is a convenient way to run your appliances when you’re off the grid. However, you should remember that it uses fuel, so be sure to empty it if you’re shipping your RV or storing it for winter. Apart from adding to your RV’s GVWM and posing a fire risk during shipping, the fuel can turn to lacquer when the vehicle is in storage for several months. This lacquer can plug the carburetor jets, resulting in a sizable repair bill.
Some RVs come with a factory fitted fuel shut off valve. If yours didn’t, consider having one installed.
How do you winterize your RV generators? Simply:
- Shut off the fuel valve and allow the generator to run until the fuel is depleted;
- Push the kill switch once it stops running.
Step 3: Winterize your RV batteries
The amount of batteries in your recreational vehicle will vary, depending on the type and model. It’s quite similar to car batteries. Some RVs have a single battery, but more luxurious motor homes can have as many as three batteries. While it is not necessary to winterize your RV batteries for a quick snowbird shipping trip, it is certainly important if you’re putting the vehicle in storage for the winter.
Check the water level on all your batteries (be sure they are fully charged!) before you disconnect, remove, and store them in a warm, dry environment. Never place RV batteries directly on a concrete floor, as that will cause it to drain slowly. Instead, place it upon a countertop, bench or on a pallet. Also remove any small batteries from:
- TV remotes
- Carbon monoxide detectors
- Wall clocks
- Smoke detectors
- And other devices.
Step 4: Winterize your RV interior
When it comes to preparing your RV interior for shipping, the same principles apply as to standard auto shipping. While UV rays can damage the interior in summer, causing fabrics to become brittle and crack, turning plastic yellow, and causing upholstery to fade, the winter wind and snow can also wreak havoc.
Here’s how to winterize your RV’s interior:
- Dust, polish, and clean everything inside the RV.
- Secure any loose items and pack away any breakable items (crockery and glass ornaments).
- Remove all personal belongings and valuables.
- Close and latch all the windows and roof vents.
- Remove all food items, including cans that can freeze and split, making a mess in your RV and attract rodents and insects.
- Apply pest control measures to prevent rodents from chewing through your wires.

Step 5: Winterize your RV exterior
Shipping your RV exposes it to road chemicals, grime and dirt. This can lead to discoloration of the finish, and can lead to rust, thus spoiling that new-car sheen and aging your RV. Many road agencies apply liquid salt (calcium chloride) to control dust on dirt roads. Unfortunately, this can damage your aluminum wheels. This is quite similar to the road salt that is applied to icy roads in winter. By shipping your RV, your vehicle has less exposure to these damaging agents.
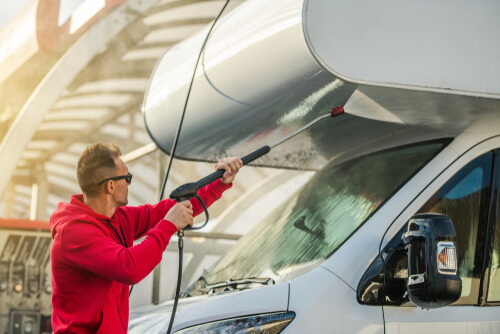
Here’s how you can ensure safe RV shipping and storage:
Wash your RV properly and give it a good wax before shipping it or storing it for the winter or before shipping it. A clean vehicle makes the process of completing the RV shipping bill of lading much quicker, as you can see exactly what the condition of the vehicle is.
Ensure that all your RV tires are properly inflated. Allowing them to flatten will cause flat spots, weak spots and sidewall cracks.
- Invest in vent covers and RV tire covers.
- Consider protecting the entire RV with a cover.
- Remove all external stairs and canopies.
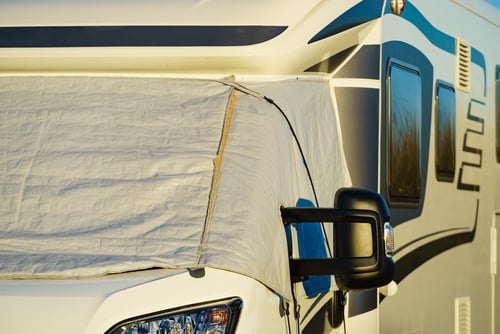
If you’re storing your RV for the winter, you could purchase an inexpensive tarp and tie it around the RV using bungee cord, or you could have it shrink wrapped.
Step 6: Winterize your RV drivetrain
As part of your RV winterization efforts, you should protect your drivetrain from cold temperatures. This should not be necessary for RV shipping, unless it is done during winter. Changing the oil and applying lubrication to the chassis are parts of the standard RV servicing.

Step 7: Winterize your RV refrigerator
If you’re putting your RV in storage, you want to keep the doors open to keep the interior dry and to prevent horrible smells and mold from forming. On the contrary, if you’re shipping your RV, you want to lock the refrigerator doors to keep them from mysteriously opening during transit, and causing a mess in your trailer.

Step 8: Winterize your RV propane tank
A propane leak could cause fumes to build up inside your RV, and it might lead to an explosion or a fire. Be sure to check that the propane is shut off at the tank. Better yet, ship your RV with an empty propane tank, and have it refilled at your destination.

Final Thoughts on RV Winterization
RV winterization might seem like a tall order from reading this article, but once you use our checklist, it will be much quicker and easier. Always be sure to use RV dealer approved cleaning materials and accessories. Are you ready to ship your RV? Request a free RV shipping quote from Nationwide Auto Transportation today.


